標籤: 零信任架構

  • 用 Gemini Managed Agents 搭建可控多代理系統

    用 Gemini Managed Agents 搭建可控多代理系統

    📌 本文重點

    • Managed Agents 讓多代理 workflow 更可控可審計
    • 背景任務與長流程能安全持續運行
    • remote MCP + 沙盒工具提升協作與安全
    • 憑證輪替支援零信任長連線場景

    Gemini Managed Agents 的最新更新,直接解決了多代理系統在實務上的四個痛點:長流程容易中斷、背景任務難管理、多代理協作缺乏控制平面、工具執行缺乏安全邊界、長連線憑證管理容易出事。如果你目前只是在做「單模型聊天 + 幾個工具」,這批能力讓你可以往「有審計、有重試、有觀測性」的多代理 workflow 進化,而且不需要自己再搭一層任務編排框架。


    重點說明

    1. 背景任務與長流程編排:從同步聊天到任務隊列

    新的 Managed Agents 支援在代理內啟動 背景任務(background tasks),並維持任務狀態。

    關鍵好處:

    • 可以把耗時操作(例如 ETL、長時間 API 輪詢、批次報表)移到背景,不阻塞前端對話。
    • 每個背景任務都有 狀態與 ID,便於你實作自家任務隊列、重試策略與恢復機制。
    • 代理本身幫你維護「對話上下文 + 任務上下文」,你只需在外層規劃任務生命週期。

    💡 關鍵: 把長流程變成有狀態、可重試的背景任務,是從「聊天玩具」升級成「可靠工作流系統」的關鍵一步。

    典型設計:

    • 前端對話 → 由主 Agent 判斷是否需要啟動背景任務。
    • 使用 Agents API 建立 task,狀態儲存在 Managed Agents 內部或你自己的 DB
    • 外部有一個「任務監控 worker」定期查詢任務狀態、做重試或告警。

    2. remote MCP / 多代理協作:控制平面 vs 應用層 SDK

    Managed Agents 現在可以直接連到 remote MCP。實務上有兩種典型 architecture:

    • 控制平面導向(Control Plane first)
    • 多個工具 / 子代理掛在 MCP server(例如一個 operations MCP、一個 data MCP)。
    • Managed Agent 只要知道 MCP endpoint,就能呼叫裡面的工具。
    • 適合大型企業,把權限、審計、資源配額集中放在 MCP 層。

    • 應用層 SDK 導向(SDK first)

    • 你在應用程式碼中透過 SDK 把工具包成 Gemini Tool / Functions,再掛到 Managed Agents。
    • 權限管理偏向 app side,例如每個 tenant 對應一組工具設定。

    關鍵差異在 權限與隔離

    • 控制平面模式:透過 MCP 做 RBAC、租戶隔離、審計;Managed Agent 像「智慧前端」。
    • SDK 模式:更靈活,適合快速迭代,但要自己補一套完整審計與 resource control

    3. 安全沙盒內整合自定義工具與函式

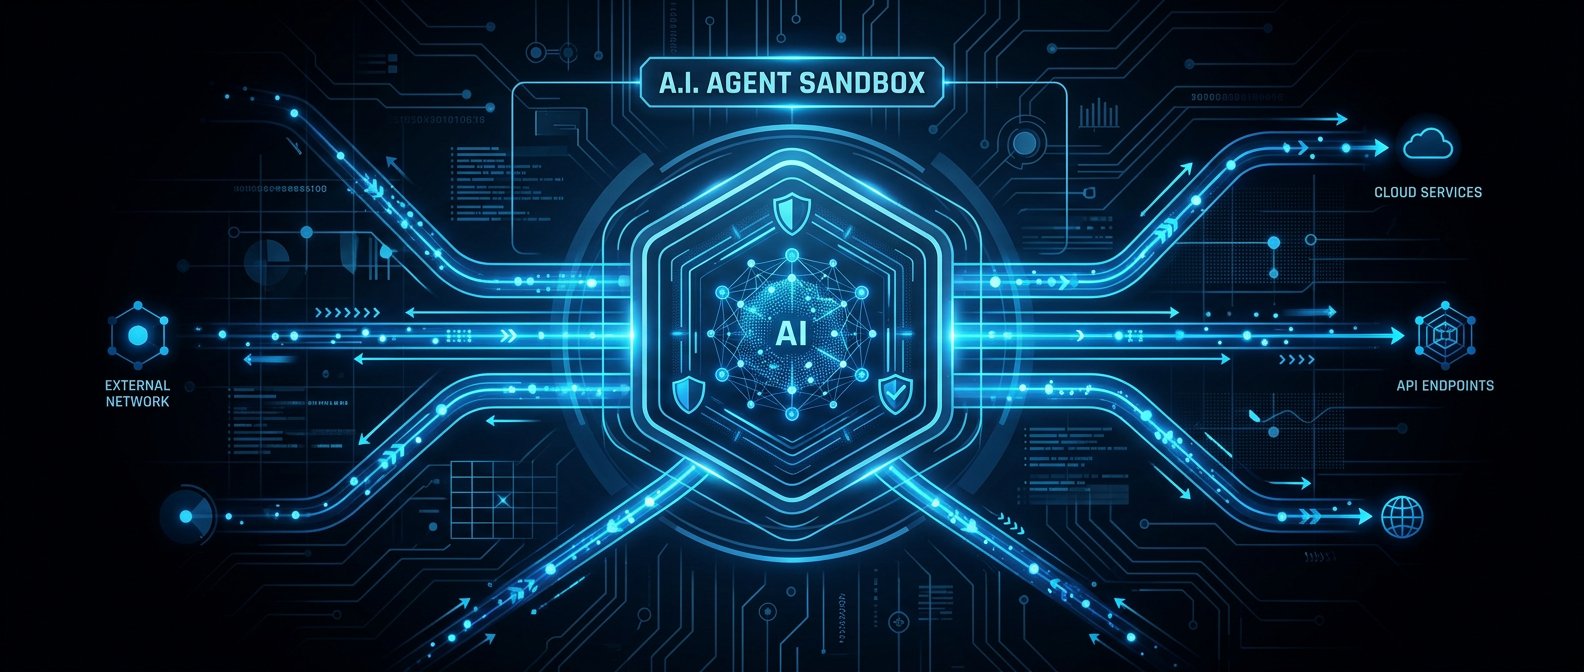
    更新後的 Managed Agents 允許在 安全沙盒(sandbox) 同時使用:

    • 官方 sandbox 工具(如瀏覽器、code executor)。
    • 你自定義的 functions / tools

    好處:

    • 你可以在受控環境內執行「可能有副作用」的操作,例如 DB query、檔案處理,而不直接暴露到外部系統。
    • 工具執行與 LLM 推理同樣有 超時與資源配額 控制,避免單一任務吃光整個 pod

    設計重點:

    • 每個工具要有明確的 作用範圍(只讀 / 可寫),把「刪除、修改」操作拆成獨立工具並 預設關閉
    • 在工具層做 輸入驗證與錯誤處理,避免 LLM 亂塞參數導致意外副作用。

    4. 憑證刷新與長連線安全:token 旋轉 + 零信任

    Managed Agents 支援在 不丟失 state 的情況下刷新憑證

    • 代理可以維持長流程(幾小時到幾天)的狀態,同時你的服務端可以定期輪替 API tokenOIDC access token
    • 這讓零信任架構更好落地:
    • 不再有「因為流程長,只好給超長效 token」的妥協。
    • 可以要求所有外部呼叫都透過短效憑證 + 中央驗證服務。

    💡 關鍵: 「長流程 + 短效憑證」的組合,讓零信任不再與實務需求衝突。


    實作範例

    以下用一個從「單模型聊天」升級成「有背景任務 + 多代理協作 + 審計」的簡化範例示意(以 Node.js 伺服器 + Gemini API 為例,為示意用虛擬碼)。

    1. 建立核心 Managed Agent

    import { AgentsClient } from "@google-ai/gemini";
    
    const agents = new AgentsClient({
      projectId: process.env.GCP_PROJECT_ID,
      location: "global",
    });
    
    // 建立主 Agent:負責對話 + 任務編排
    async function createMainAgent() {
      const [agent] = await agents.createAgent({
        parent: "projects/xxx/locations/global",
        agent: {
          displayName: "orchestrator-agent",
          model: "gemini-2.0-pro",
          // 掛上 MCP 與工具
          tools: [
            { mcpServer: { endpoint: process.env.MCP_OPS_URL } },
            { mcpServer: { endpoint: process.env.MCP_DATA_URL } },
            { functionDeclarations: [
              {
                name: "schedule_background_job",
                description: "Create a background task for long-running workflow",
                parameters: {
                  type: "object",
                  properties: {
                    jobType: { type: "string" },
                    payload: { type: "object" },
                  },
                  required: ["jobType", "payload"],
                },
              },
            ]},
          ],
          // 安全設定:限制可寫操作
          safetySettings: {
            allowWriteOps: false,
          },
        },
      });
    
      return agent.name; // 用來後續呼叫
    }
    

    重點:

    • AgentsClient.createAgent 建立主 Agent,掛上多個 MCP 伺服器 與自定義 function
    • safetySettings 示意限制寫入操作,實務上可自訂更細。

    2. 前端對話:從「單次聊天」變成可啟動背景任務

    // 使用者傳入訊息,主 Agent 可能決定啟動背景任務
    async function handleUserMessage(agentName: string, sessionId: string, text: string) {
      const [response] = await agents.generateMessage({
        name: agentName,
        // sessionId 用你自己的,方便日後審計與追蹤
        session: { id: sessionId },
        prompt: { text },
      });
    
      // 若 LLM 觸發工具呼叫,可能是 schedule_background_job
      if (response.toolCall) {
        const call = response.toolCall;
        if (call.name === "schedule_background_job") {
          const taskId = await createBackgroundTask(call.args);
          // 把 taskId 回寫到對話,讓使用者可以查詢
          return { reply: `已建立背景任務,ID: ${taskId}` };
        }
      }
    
      return { reply: response.outputText };
    }
    

    這裡用 generateMessage(或官方實際命名類似方法)示意:

    • 你自己維護 sessionId,不要依賴傳輸層的 session 概念,以免遇到像 MCP 無狀態 變更就斷鏈。
    • 工具呼叫觸發後,交給應用層建立背景任務。

    3. 背景任務隊列與重試設計

    // 簡化版任務建立
    async function createBackgroundTask({ jobType, payload }) {
      const taskId = crypto.randomUUID();
    
      await db.tasks.insert({
        id: taskId,
        type: jobType,
        payload,
        status: "pending",
        retryCount: 0,
      });
    
      return taskId;
    }
    
    // 任務 worker:定期跑
    async function taskWorkerLoop() {
      const tasks = await db.tasks.find({
        status: { $in: ["pending", "retry"] },
      }).limit(50);
    
      for (const task of tasks) {
        try {
          await runTask(task); // 實際呼叫 MCP 或其他工具
          await db.tasks.update(task.id, { status: "done" });
        } catch (err) {
          const nextRetry = task.retryCount + 1;
          if (nextRetry > 3) {
            await db.tasks.update(task.id, { status: "failed" });
          } else {
            await db.tasks.update(task.id, {
              status: "retry",
              retryCount: nextRetry,
            });
          }
        }
      }
    }
    

    重點:

    • 背景任務管理放在你的應用層,但任務內容可以是對 Managed Agents / MCP 工具 的呼叫。
    • 任務狀態與重試策略明確放在 DB,避免「背景任務孤兒進程」沒人管。

    4. 憑證刷新與零信任示意

    // 透過中介層取得短效 token,供 AgentsClient 使用
    async function getAgentsClient() {
      const token = await authService.getRotatingToken(); // 有效期 15 分鐘
      return new AgentsClient({
        authToken: token,
        projectId: process.env.GCP_PROJECT_ID,
      });
    }
    
    // 每次呼叫都用最新 token
    async function safeGenerateMessage(agentName, sessionId, text) {
      const client = await getAgentsClient();
      const [response] = await client.generateMessage({
        name: agentName,
        session: { id: sessionId },
        prompt: { text },
      });
      return response;
    }
    

    這種做法搭配 Managed Agents 的「不丟 state 憑證刷新」能力,可以在維持長流程的同時,讓底層 token 持續輪替。


    建議與注意事項

    1. 防止 Agent 自動刪庫型事故

    • 所有「修改 / 刪除」類工具:
    • 預設不掛到主 Agent,改掛到專門的「ops Agent」,再用人工或嚴格策略觸發。
    • 在工具層做 白名單 / 黑名單 檢查,例如禁止 DROP TABLE、限制影響範圍。
    • 所有高風險操作應要求:
    • 二次確認(LLM 生成計畫 → 使用者或守門服務審核 → 才執行)。

    2. 審計與回溯:不要把責任丟給 MCP

    MCP 轉為 stateless 之後,如果你沒自己建立 trace id,就會遇到:

    • 同一條資金轉帳流程,log 看起來是四個不相干的事件,無法證明「誰觸發了什麼」。

    建議:

    • 在應用層產生 correlationId / traceId,寫入:
    • 所有 Agents API 呼叫
    • MCP 請求的 metadata
    • DB 任務表與 log 系統
    • 在出事時可以把「對話 → Agent 決策 → MCP 工具呼叫 → DB 操作」串回一條 timeline

    3. 背景任務治理:避免孤兒進程與資源爆炸

    • 每個任務必須有:
    • 明確 statuspending / running / retry / failed / done)。
    • 最大重試次數與 退避策略exponential backoff)。
    • 超時與最大執行時間限制。
    • 週期性 job 清理:
    • 清掉超過 SLApending 任務,標記為 timeout_failed
    • 對高失敗率任務發告警,不要無限重試打爆外部 API

    4. 多代理協作架構選型

    • 團隊偏「平台 / SRE」:建議 控制平面模式,用 MCP 集中治理,Managed Agents 做業務邏輯。
    • 團隊偏「產品 /快速迭代」:先用 SDK 模式,在 app 層掛工具,後續再逐步抽到 MCP。

    5. Observability:為多代理 workflow 補上眼睛

    • 最低限度:
    • 每次 Agent 呼叫記錄:agentNamesessionIdtraceId、使用工具列表、執行結果。
    • 建議導入:
    • 分散追蹤(如 OpenTelemetry),把 Agents / MCP / DB 統一進 tracing system。
    • 守門 dashboard:顯示背景任務隊列狀態、失敗率、平均耗時。

    結論:Gemini Managed Agents 的背景任務、remote MCP、安全沙盒工具與憑證刷新能力,讓你可以在現有專案裡自然從「單模型聊天」過渡到「可控、可審計的多代理 workflow」。核心心法是:把任務編排與審計留在應用層,讓 Managed Agents 專心做協作與自動化,並以零信任與資源治理觀點設計整體架構。

    🚀 你現在可以做的事

    • 在現有聊天應用中加入 sessionIdtraceId 與簡單任務表,開始嘗試背景任務編排
    • 盤點現有工具,決定哪些適合掛在 MCP、哪些用 SDK 模式直接掛到 Managed Agents
    • 規劃短效 token 取得流程,實作一個中介層 authService.getRotatingToken() 來配合 Managed Agents 使用
  • Claude 私有化:自托管沙箱與 MCP 隧道實戰

    Claude 私有化:自托管沙箱與 MCP 隧道實戰

    📌 本文重點

    • 模型與編排托管在 Anthropic,工具與資料留在你 VPC
    • 透過 self‑hosted sandbox 把程式執行權收回內網
    • 用 MCP tunnel 只開安全出站連線打通內網工具
    • 權限設計與審計要靠嚴格的 tools schema 與網路邊界

    典型企業場景:你想讓 Claude Managed Agent 幫你跑 CI/CD、讀內網 Git、打內部 REST / Postgres API,但 不能開公網入站、不能把 Git 暴露出去。這次的 self‑hosted sandboxes + MCP tunnels 更新,基本上就是:

    模型與編排留在 Anthropic,工具執行與資料存取拉回你自己的 VPC,且只用安全出站連線。

    實務上等於多了一種選擇:不用把模型拉進內網自建 inference,也能在嚴格邊界內讓 Agent 控制 CI、讀 repo、查 DB。


    重點說明:架構與安全邊界怎麼畫

    1. Orchestrator vs Tools:誰在外面、誰在裡面?

    Claude Managed Agents 大致拆成兩層:

    1. Orchestrator(Anthropic 端托管)
    2. 理解使用者意圖、規劃步驟、決定要叫哪些工具。
    3. 透過 MCP 協定 呼叫你定義的 tools(MCP server)。

    4. Tools / MCP servers(你自己控制)

    5. 例如:git、CI/CD runner、Postgres、內部 REST API
    6. 可以跑在 self‑hosted sandbox 裡(受控容器/VM),或直接在你內網 VPC。

    💡 關鍵: Orchestrator 永遠只看得到你暴露出的 MCP tools 與其 I/O,真正的 Git / DB 資料面與執行權都留在你 VPC。

    關鍵:Orchestrator 看不到你的 Git/DB,只能透過你暴露出的 MCP tools 操作,權限由你決定。


    2. MCP 協定與 server:最小必須心智模型

    MCP server 就是一個會講 JSON‑RPC over stdio / WebSocket 的後端,向 Agent 宣告自己有哪些工具。概念類似「強 typing 的 function calling」。

    一個簡化版的 MCP server schema(YAML)可能長這樣:

    name: corp-dev-tools
    version: 0.1.0
    
    tools:
      - name: git_read_file
        description: 讀取內部 Git repo 某個檔案內容
        input_schema:
          type: object
          required: [repo, path, ref]
          properties:
            repo: { type: string }
            path: { type: string }
            ref:  { type: string }
    
      - name: ci_trigger_pipeline
        description: 觸發 CI pipeline,只能在 allowlist 專案上執行
        input_schema:
          type: object
          required: [project, branch]
          properties:
            project: { type: string }
            branch:  { type: string }
    

    Agent 端會看到 明確的工具清單與參數結構,再決定何時呼叫。


    3. Self‑hosted sandbox:把「程式執行權」留在自己這邊

    self‑hosted sandbox 解決的是:「我不想讓 Anthropic 直接在他們 infra 上跑 shell / Python,請改在我 VPC 裡跑」。

    實作上可以是:

    • 一個專用 k8s namespaceFargate / VM,跑 Anthropic 提供的 sandbox runtime。
    • Agent 要執行程式碼(例如跑單元測試、lint、git 操作),會透過安全通道把 code / 指令丟到這個 sandbox。

    典型邊界設計:

    • sandbox 只能出站連到:
    • 你的 Git / CI / DB / 內部 API
    • Anthropic 的 MCP tunnel endpoint
    • 不能直連其他敏感系統(或至少預設 deny)。

    實際好處: Agent 可以幫你跑 pytest、打 CI webhook、改 Git branch,
    但所有「可以執行程式碼的環境」都在你的控制下,方便做防火牆、資安掃描、審計。


    4. MCP tunnels:如何在不開洞的情況下連到內網

    MCP tunnel 解決:「我的 MCP server 在 VPC 裡,如何讓 Anthropic 托管的 Agent 打到它,但我不願意開入站 443?」

    典型拓撲:

    [Anthropic Orchestrator]
            ^
            | (MCP over tunnel)
            v
    [MCP Tunnel Client in VPC] ----> [MCP Server + Sandbox]
              (outbound TLS)
    

    關鍵特性:

    • 只有 VPC → Anthropic 的出站連線(類似反向隧道)。
    • 隧道建立後,Anthropic 端像是在打本地 MCP server,但實際流量是經由你建立的 mutual TLS / token 隧道轉回來。
    • 容易套用零信任思路:每條隧道都視為一個 identity,綁定最小權限的一組 tools。

    💡 關鍵: 只用出站隧道與 mTLS,就能在不開任何入站 port 的前提下,把內網工具安全地接給 Managed Agent 用。


    實作範例:VPC 內最小可行架構

    場景:

    • VPC 內:
    • 一台 MCP server + sandbox Pod/VM。
    • 連得上 GitLab、Postgres、內部 https://api.intra
    • 出站:允許打到 Anthropic 的 MCP tunnel endpoint

    1. MCP server:Git + Postgres + REST API

    以 Node.js 為例(pseudo‑code):

    import { MCPServer } from "@anthropic-ai/mcp-sdk";
    import { execSync } from "node:child_process";
    import { Client } from "pg";
    import fetch from "node-fetch";
    
    const gitAllowlist = ["service-a", "service-b"];
    
    const server = new MCPServer({ name: "corp-dev-tools" });
    
    server.tool("git_read_file", async ({ repo, path, ref }) => {
      if (!gitAllowlist.includes(repo)) {
        throw new Error("repo not allowed");
      }
      const base = "/srv/git/" + repo;
      const content = execSync(`git --git-dir=${base} show ${ref}:${path}`, {
        encoding: "utf8",
      });
      return { content };
    });
    
    server.tool("db_read_customer", async ({ id }) => {
      const client = new Client({
        host: process.env.PG_HOST,
        user: "readonly_agent",
        password: process.env.PG_PWD,
        database: "app",
        ssl: true,
      });
      await client.connect();
      const res = await client.query("SELECT id, name, status FROM customers WHERE id=$1", [id]);
      await client.end();
      return { rows: res.rows };
    });
    
    server.tool("call_internal_api", async ({ path, method, body }) => {
      if (!path.startsWith("/public-agent/") || method !== "POST") {
        throw new Error("not allowed");
      }
      const resp = await fetch(`https://api.intra${path}`, {
        method,
        headers: { "Authorization": `Bearer ${process.env.AGENT_TOKEN}` },
        body: JSON.stringify(body ?? {}),
      });
      const json = await resp.json();
      return { status: resp.status, data: json };
    });
    
    server.listen();
    

    重點:

    • gitAllowlist:避免 Agent 任意讀所有 repo。
    • Postgres 使用 readonly_agent 帳號,限制只讀特定 schema。
    • 內部 API 降到 /public-agent/ 子路徑 + 專用 token。

    2. MCP tunnel client:出站連上 Anthropic

    實際指令會以官方 CLI / container 為主,概念配置類似:

    anthropic-mcp-tunnel \
      --mcp-url=http://localhost:8000 \
      --agent-id=corp-ci-agent \
      --tls-cert=/etc/mcp/cert.pem \
      --tls-key=/etc/mcp/key.pem \
      --anthropic-endpoint=https://mcp-tunnel.anthropic.com \
      --tags=env:prod,scope:ci
    

    在 Anthropic 控制台,你會:

    • 建立一個 Managed Agent:corp-ci-agent
    • 只綁定這條 tunnel 曝露的 corp-dev-tools MCP server。
    • 開啟前人工審閱 / 部分工具 auto‑approve(視風險)。

    3. ACL 與工具權限設計

    簡單的 policy‑as‑code 思路:

    agent: corp-ci-agent
    allowed_tools:
      - git_read_file
      - ci_trigger_pipeline
      - db_read_customer
      - call_internal_api
    
    constraints:
      git_read_file:
        repos: ["service-a", "service-b"]
        max_file_size_kb: 256
    
      db_read_customer:
        max_rows: 1
    
      call_internal_api:
        allowed_paths:
          - "/public-agent/deploy"
          - "/public-agent/status"
    

    你可以在 MCP server 裡讀這個 YAML,做額外校驗。不要把 ACL 寫死在 prompt 裡,防禦提示注入要靠程式碼與網路邊界。


    建議與注意事項:安全坑與實務整合

    1. 工具權限過大 = Agent RCE 風險

    OWASP Agent Top 10 已經把 工具濫用 / 權限濫用 列為前幾名風險。常見錯誤:

    • 一個 tool 可以執行任意 shell、對任何 DB 下任意 query。
    • Agent 可以打到整個內網,而不是只打 CI / Git / API Gateway。

    建議:

    • 一個 tool 做一件小事,強 schema,避免 free‑form SQL / shell。
    • DB 使用 只讀 + row‑level / column‑level policy
    • 網路上用 安全群組 / SG 把 sandbox 能打的 IP 段鎖死。

    2. 審計 / Logging:要記「自然語言意圖 + 工具調用」

    很多企業只有 infra log,缺少「Agent 為什麼要做這件事」的上下文。

    建議最低標準:

    • 針對每次工具呼叫記錄:
    • user_id / session_id
    • Agent 看到的 自然語言任務描述(可脫敏)
    • 工具名稱 + input 參數(敏感欄位做 partial redaction)
    • 執行結果摘要 / status code

    這樣在事後對齊 OWASP 事件分析時,才能把「提示注入 → 工具濫用 → 資料外洩」串成一條 timeline。


    3. 網路與認證:守住 MCP 隧道與 secrets

    重點:把隧道視為一個高價值通道,跟 VPN 一樣認真看待。

    具體建議:

    • 隧道一律走 mTLS,cert 由內部 CA 或雲端 CA 管理。
    • 隧道 client 的 API token / cert 放在 Vault / KMS,sandbox 上只拿短期 lease。
    • 工具裡 不要回傳 secrets(例如整個 JWT 與 DB 密碼)到 Agent,必要時只在 server 端使用。
    • 若擔心 API key 滲透,在 sandbox 層加 egress proxy,對外送出的 HTTP header 做檢查 / scrub。

    4. 與 SOAR/服務目錄/Secrets 管理整合的實務問題

    實務上會遇到:

    • SOAR / ticket 系統
    • 建議把「開 ticket / 查告警 / 執行 playbook」封裝成 MCP tools,權限沿用既有 RBAC。

    • 服務目錄(例如 Backstage)

    • MCP tools 可以讀服務目錄 API,讓 Agent 知道 repo 屬於哪個團隊、能不能改 config。

    • Secrets 管理(Vault/KMS)

    • 不要給 Agent 直接讀 Vault 的能力;改由 MCP tool 在 server 端解密,對 Agent 只暴露結果(或再加工)。

    5. 和「模型拉進內網自建 inference」的取捨

    Managed Agent + self‑hosted sandbox + MCP tunnel:

    • 優點:
    • 不用自己跑 LLM cluster,只負責工具、網路、權限
    • 快速接雲端最新模型(含之後像 Mythos 這種安全模型的企業版)。
    • 合規上:資料只經由 tools 進出,你可以精準監控。

    • 缺點:

    • Orchestrator 還是在 Anthropic,那邊仍會看到 工具 I/O 摘要
    • 對極端資料主權(完全不能出域)的場景不適合。

    自建 inference:

    • 優點:
    • 完整掌控模型與權限,所有 token 在你網段內。

    • 缺點:

    • 要自己做 Agent orchestration、tooling、guardrail、OWASP Top 10 風險防護。
    • 成本與維運門檻高。

    如果你目前已在雲上、允許「模型在外、資料在內」,這次的 Claude Managed Agents 私有化能力 是一個相對平衡的折衷:

    把最麻煩的 LLM 與 Agent orchestration 交給 Anthropic,把最敏感的程式執行與資料權限留在 VPC,用 MCP + sandbox 畫清楚邊界。

    🚀 你現在可以做的事

    • 在現有 VPC 內起一個簡單 corp-dev-tools MCP server(照文中 Node.js 範例改成你公司的 Git / DB / API)
    • 部署 anthropic-mcp-tunnel 類似的隧道 client,實測只用出站連線即可讓 Managed Agent 操作內網工具
    • 寫一份 YAML ACL(如文中 policy‑as‑code 範例),把 repo / DB / API 權限具體收斂後再開放給 Agent 使用